How to Run an Egocentric Data Collection Program

Leela Yanamaddi
September 17, 2026
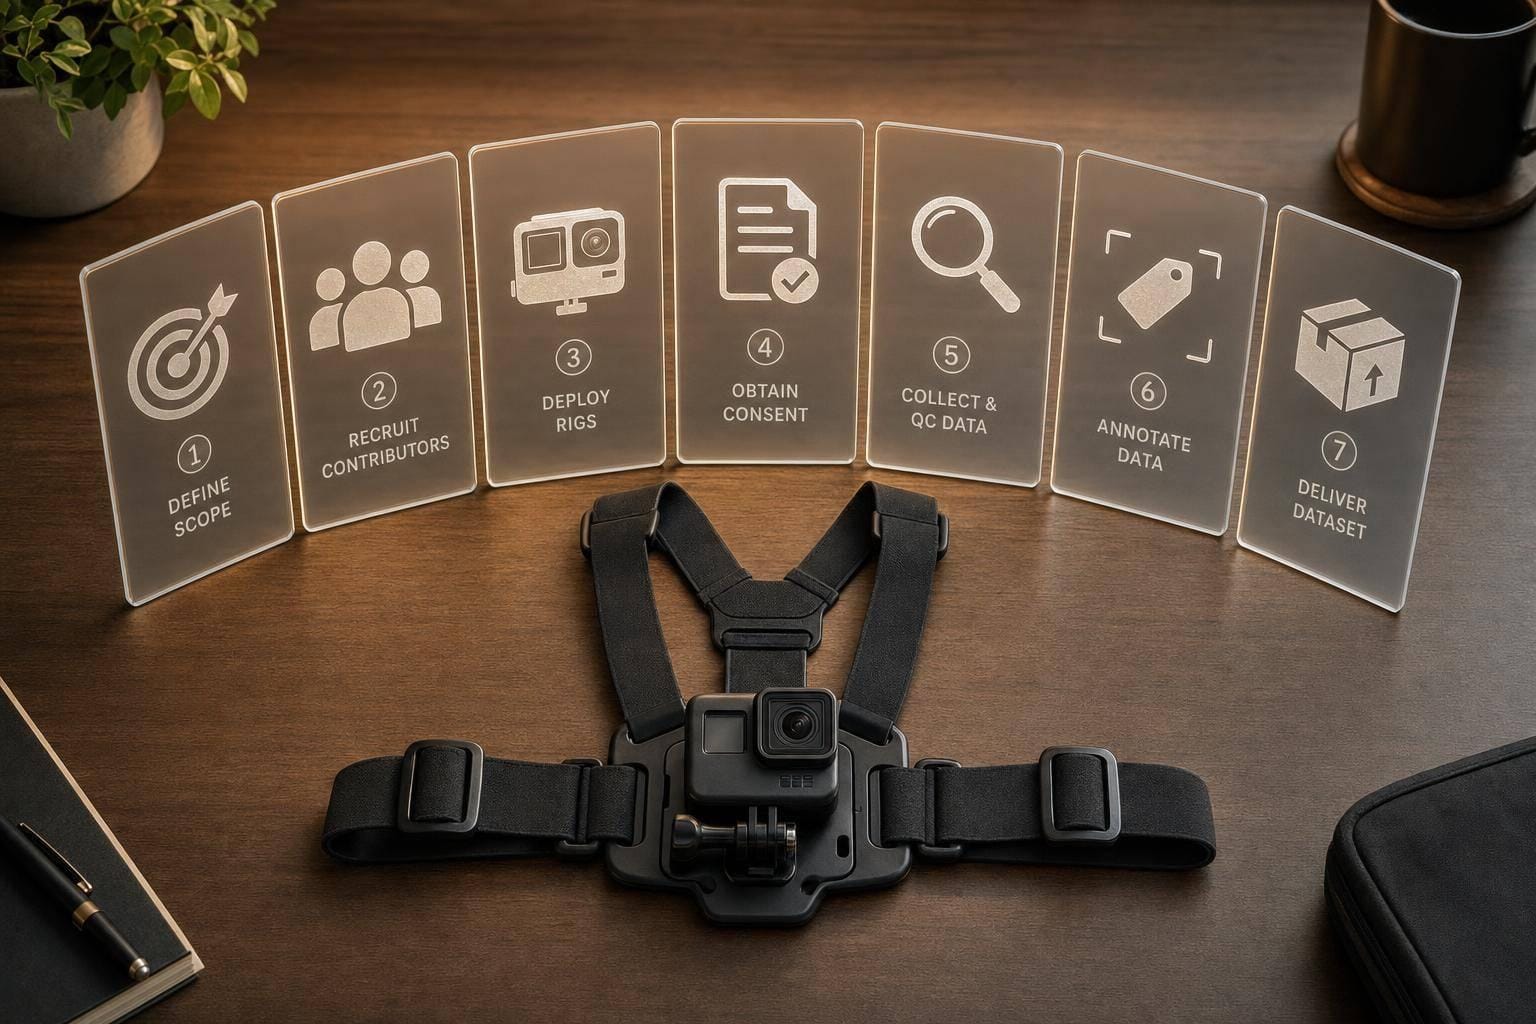
If your first-person data program is loose, your training set will be weak. From the start, I’d lock down 7 parts: scope, contributors, gear, consent, privacy, QC, and delivery.
Here’s the short version:
- I’d define tasks, episode rules, settings, sensors, and metadata before anyone records.
- I’d start with a pilot of 5–10 contributors and 20–50 hours to find failure points early.
- I’d plan for 50–200 hours per main task, plus a 20%–30% buffer for lost footage.
- I’d use 1080p/30 fps as a base and switch to 60 fps for fast hand work.
- I’d require written consent, site approval, restricted zones, and redaction before annotation.
- I’d block weak clips at QC, not after spending money on labels.
- I’d ship the data with manifests, split rules, consent status, and audit history.
In other words: this is not just about video. It’s about building a system that can produce usable data again and again, without legal mess, weak labels, or broken files.
A few numbers stand out. Contributor pay often lands around $20–$40/hour. Annotation can cost $15–$35 per hour of usable video. Storage can hit 50–100 GB per contributor per week. And a healthy program should aim for a first-pass QC rate of 85%+.
Here’s the article in one simple checklist:
- Set the scope: tasks, edge cases, quotas, settings, and volume
- Recruit the right people: skill fit, safety screening, and clear briefs
- Pick the rig: head, chest, or wrist based on the task
- Run collection well: pre-checks, logs, uploads, and incident handling
- Handle consent and privacy: forms, site rules, signage, redaction, and withdrawal flow
- Run QC first: reject clips with poor hand view, poor object view, or missing steps
- Package the dataset: annotations, manifests, split logic, dataset card, and acceptance report
This article shows how I’d turn first-person recording from a one-off project into a repeatable program.
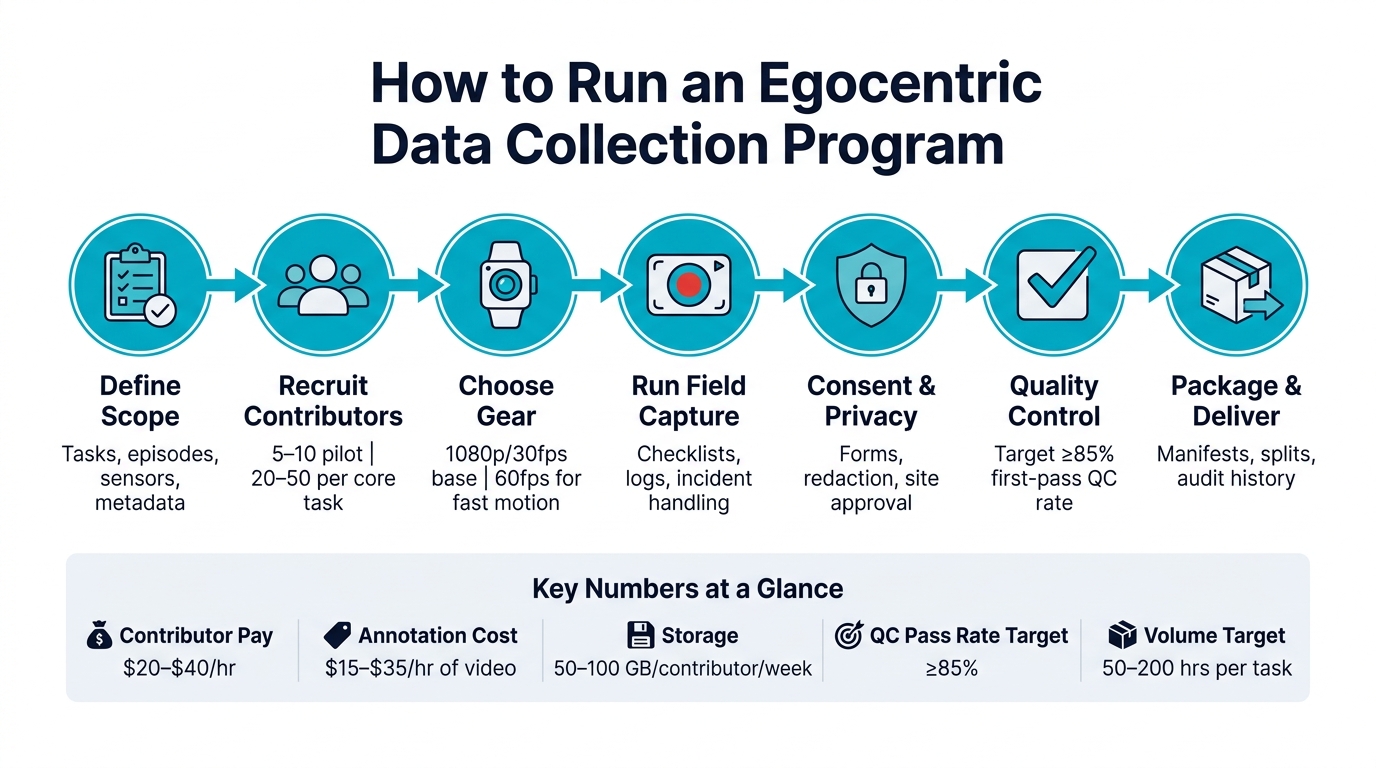
Egocentric Data Collection Program: 7-Step System Overview
1. Define the dataset scope before recording starts
Before recording begins, lock down the task list, episode rules, coverage plan, and target volume. Those choices decide what usable training data looks like. Put it in writing. The plan should answer four basic questions: What tasks are we recording? In which settings? With what sensors? And how much data do we need?
Map model goals to task categories and episode definitions
Start with the exact capabilities the model needs to show, such as grasping varied objects, moving through tight spaces, or following multi-step instructions. Then tie each one to clear task categories. For example, a warehouse picking model could split into bin picking, cart loading, and barcode scanning. If a task category does not tie back to a model evaluation target, it burns budget and storage for no good reason.
After that, write plain, exact episode definitions. For a packing task, an episode might be:
"Start = first deliberate hand motion toward any item in the packing area. End = box closed and sealed, OR worker clearly transitions away from the station."
That kind of detail keeps annotators and contributors on the same page without constant back-and-forth. Spell out edge cases too: failed grasps, drops, interruptions, tool changes, and safety stops. Give them quotas. A good floor is at least 10% error or interruption episodes per task.
Set environment coverage, sensor specs, and metadata fields and labels
Environment coverage needs its own written plan, with minimum quotas for each scene type. In a U.S. warehouse program, that could include aisles, loading docks, packing stations, and freezer rooms. It should also call out lighting coverage for daytime, nighttime, and mixed or artificial light. Define shift timing in local time as well, such as early morning (6:00–9:00 AM), daytime (9:00 AM–5:00 PM), and evening/night (5:00–11:00 PM).
For sensor specs, use 1080p at 30 fps as the baseline. Move to 60 fps when the job involves fast hand motion or tiny motion fixes. Capture IMU data at 100–200 Hz, and sync every stream with one timestamp format so downstream teams can line up modalities without guesswork. Document every setting in one reference file: camera model, field of view, codec, bitrate, and audio sample rate. Also include a short calibration episode at the start of each shift where the contributor walks a marked path and performs standard head rotations. That makes sensor drift easier to spot before it pollutes a full day of footage.
Metadata fields should be set now, not patched in later. At a minimum, each episode record should include:
- contributor ID (pseudonymized)
- location type
- date and local time in U.S. format
- task category
- lighting level
- clutter level
- noise level
- equipment used
- privacy flags
Use controlled vocabularies with fixed labels, such as lighting: "low" | "medium" | "high", so filtering and train/validation splits can be built in code later.
Plan volume, schedule, and budget targets
Once the scope is fixed, tie volume targets straight to model evaluation needs. A practical starting point is 50–200 hours per major task category for initial training, plus 20–50 contributors per core task so the model does not lean too hard on one person’s motion style. Since episode length can swing a lot, track both hours and episode counts. Pick-and-place episodes may last 30–90 seconds, while cleaning episodes may run 10–20 minutes. Your tracking table should include task category, target hours, target episodes, contributors, and key coverage requirements.
Run a small pilot first: 5–10 contributors, 20–50 hours. This is where teams usually learn the hard truth. Usable-episode yield after QC is almost always lower than raw recording hours make it seem. That pilot gives you a cleaner read on actual dataset quality. Add a 20–30% buffer to planned hours to cover footage lost to privacy issues or bad capture.
For budget, build a bottom-up model in U.S. dollars. Hardware usually costs $300–$600 per camera and $50–$150 per mounting kit. Buy 10–20% extra units for replacements. Contributor pay of $20–$40/hour is standard, depending on skill level and location. Annotation runs about $15–$35 per hour of usable video. High-resolution footage can create 50–100 GB per contributor per week, so cloud storage and egress need their own budget line. Add a 10–20% contingency for facility limits, replacement gear, or a larger annotation workload than planned.
These definitions become the operating rules for contributor briefs, capture checklists, QC, and annotation.
2. Recruit contributors and run reliable field capture
Define contributor profiles, onboarding steps, and task briefs
Once the scope is locked, recruit contributors who can produce the exact episode types you mapped out. Build contributor profiles around task skill, physical tolerance, and familiarity with the setting. For some tasks, that means a mix of typical users and domain experts sized to the job. Tag each episode with the performer's profile so you can split expert benchmark episodes for evaluation from novice-heavy episodes for training.
Physical screening matters more than teams sometimes expect. Contributors may wear the rig for hours, so basic mobility and enough neck or torso strength are real selection criteria. Any selection rules also need to follow site safety and labor requirements.
Onboarding should cover the basics that keep the day from going off the rails:
- Safety briefing
- Camera handling and battery steps
- End-of-day upload process
- Privacy rules
- Escalation contacts
- A hands-on demo
Before a first live session, contributors should show they can mount the camera and start a recording on their own. Signed acknowledgment forms wrap up the process.
After clearance, give contributors briefs that define the task without dictating every move. The goal is structure, not choreography. Each brief should state the objective in one sentence, spell out environment limits and the allowed time window, list the high-level milestones, and note the required mount, minimum episode length, and any actions that must remain in frame. It also helps to include one acceptable episode description and one rejectable example, such as frequent lens occlusions or missing key steps, so people can calibrate their own work. Store briefs in a versioned library and update them using QC rejection reasons from past rounds. Add a plain pause/stop rule for private or unsafe areas so contributors can stop without penalty.
Choose wearable rigs and capture settings for the target tasks
After the brief is ready, lock the rig and capture settings to the task. Rig choice usually comes down to four things: hand visibility, scene context, comfort, and how closely the camera matches the target robot's point of view.
| Mount type | Strengths | Tradeoffs | Best fit |
|---|---|---|---|
| Head-mounted | Best hand-object visibility; closest to human eye or robot head viewpoint | More intrusive; may conflict with hard hats or other PPE | Manipulation tasks, cooking, assembly, or tool use |
| Chest-mounted | More comfortable for long shifts; stable footage | Slightly reduced view of near-hand actions | Logistics, longer wear sessions, some ADL tasks |
| Wrist-mounted | Detailed views of hand-object interactions | Loses scene context; noisy with fast motion | Fine-grained tool use only, rarely sufficient alone |
EPIC-KITCHENS used a head-mounted GoPro set to linear FOV, 59.94 fps, and 1920×1080 resolution, with participants adjusting the mount to keep hands centered in frame. That setup gives a good reference point, but it shouldn't be copied blindly. Run short pilot sessions for each mount option on your own tasks, then review sample clips against your QC rules before picking one for the full program.
Once you choose settings, lock them by cohort and version them. If resolution or frame rate changes halfway through the program, model training gets messy and dataset integration gets harder. A wide or ultra-wide FOV of 120–150 degrees usually works well because it keeps both hands and the nearby scene in view. If distortion becomes an issue, fix it during pre-processing.
Battery planning is simple but easy to skimp on. Assign at least two batteries per active camera, keep a third for long shifts or remote sites, and hold spare units equal to 10–20% of deployed cameras. If you want less overfitting to one device, use more than one camera model. Ego4D did this with seven different head-mounted cameras across its wearers.
Run daily collection with checklists, logs, and incident handling
Each session should start with the same pre-session check: battery at 80% or higher, enough free storage for at least the planned session length, clean lens, secure mount, local-time sync checked before recording, and a short test clip reviewed for framing. Contributors submit that check in a mobile app or web portal, often with a photo of the mounted camera. Supervisors can then pull random daily samples to confirm compliance. If a session has no confirmed pre-check, flag it for early QC review.
Session logs should record contributor ID, camera ID, task brief ID, start and end times, location type, and notable events like a bumped camera or an unexpected bystander entering the frame. Upload windows, often at lunch and at the end of the day, feed an automated ingestion pipeline. That pipeline renames files using a fixed naming convention, validates checksums, and routes footage into structured storage. End-of-day verification should confirm that every expected session has a matching uploaded file. Any gap gets flagged for next-day follow-up.
The same checklists should also drive failure logging and escalation. Incident handling follows a clear priority order: safety and privacy first, data quality second. If a camera fails during a task and continuing would be unsafe, the contributor stops, switches to a spare unit or reschedules, and logs the camera ID and error type right away. If bystanders enter the frame, add a privacy flag to the clip for post-processing review. Safety incidents follow site emergency procedures first, and only then get added to the log. If the same issues keep showing up, retraining, device replacement, or both should follow. Those logs and privacy flags feed the consent and review workflow next.
3. Put consent, privacy, and licensing workflows in place
Consent, privacy, and licensing determine whether recorded footage can be used for annotation, training, or partner delivery. Those rules need to be set before collection starts to scale. Use incident logs and privacy flags from capture to trigger consent review, redaction, and withdrawal handling.
Build consent and facility approval into the intake process
Every contributor needs to sign a written consent form before their first session. Keep the form in plain English. It should clearly explain what is recorded, why it is recorded, who can access it, how long it is kept, and how contributors can ask for clip deletion.
It also needs to state, in direct terms, that the footage may be used to train and evaluate AI models, including commercial use. And it should make one point crystal clear: participation is voluntary and will not affect employment evaluations.
Site approval also needs to happen in writing before any recording begins, with HR, legal, safety, and union review where required. That approval should spell out allowed recording zones, permitted hours, PPE limits, and audio recording rules. Put readable signage at entrances and near recorded zones stating that first-person video is being captured for AI training, along with a contact for questions or opt-out requests.
In multi-tenant facilities, you may need separate approvals from each client whose operations or branded materials appear on camera. If one hallway shows three companies’ logos, one sign-off may not cut it.
Once access is approved, privacy rules should be enforced at the point of capture, not left for later review.
Apply privacy controls during capture and post-processing
Privacy-by-design comes down to location rules, contributor behavior, and redaction tools working together. Use three controls:
- Restricted zones
- Pause rules
- Technical redaction
Restricted zones are non-negotiable. Restrooms, locker rooms, medical areas, HR offices, and any area the facility marks as trade-secret sensitive must be off-limits. Use written pause rules for sensitive conversations, and notify bystanders when recording may affect them.
If bystanders may appear again and again, give them a contact or project email they can use to flag clips or request removal. Assign a privacy steward to escalate repeat issues to legal and compliance.
Post-processing is there to catch what capture rules miss. Automated redaction should run before footage enters annotation pipelines. That includes face and body blurring, screen and document redaction, logo and brand masking, and audio muting or filtering when needed. Default to muted audio or non-conversational audio unless speech is required for the task.
That matters more than many teams expect. An audit of 2,852 datasets found only 605, about 21%, were legally permissible for commercialization.
Define licensing terms, provenance records, and retention rules
Once capture controls are in place, define what the dataset can legally be used for. Retention schedules should be set up from the start and tied to consent and license terms.
| Term | Internal use | Partner use | Commercial licensing |
|---|---|---|---|
| Permitted users | Staff and internal systems only | Named partners under defined projects | External licensees under contract |
| Model training | Internal research and product development | Joint training and evaluation | Commercial training and deployment |
| Sublicensing | Not permitted | Limited, partner-specific | Allowed under defined terms |
| Raw data sharing | Not permitted | Restricted, under NDA | Strictly controlled |
| Re-identification | Prohibited | Prohibited | Prohibited |
For each tier, spell out rights, attribution, indemnity, and liability. If those terms are vague, enforcement gets messy fast.
Provenance records are what make licensing rules stick in practice. For each clip, record the pseudonymized contributor ID, signed consent version, approved facility and zone, timestamps, hardware, and every processing step, including redaction tool version and time. Track each handoff too: ingestion ID, storage location, access controls, and vendor exports.
When a contributor asks to withdraw, acknowledge the request within 3 business days, remove the clip within 30 days, and release a new dataset version. Keep an auditable record of that action so the dataset stays traceable.
4. Build QC, annotation, and dataset packaging for training use
Raw footage is not a dataset. It only becomes training data after it passes QC, gets labeled, and is packaged in a way a team can use and audit later. The key is simple: move every clip through that pipeline without losing provenance.
Set clip-level QC rules before annotation begins
Set QC gates before annotation starts. That one decision saves time and money. If you send weak footage to annotators, you pay for labels on clips that may never belong in the training set.
A practical clip-level QC scorecard can use eight dimensions on a 0–2 scale, where 0 = reject, 1 = marginal, and 2 = good.
| QC Dimension | What to Measure | Example Threshold |
|---|---|---|
| Hand visibility | Share of task-critical frames with at least one hand visible and not fully occluded | ≥80% of the manipulation segment |
| Object visibility | Share of frames where target objects stay in frame and meet the minimum object-size threshold | Target object remains visible for the key action |
| Exposure | Overexposed or underexposed frames that obscure scene detail | ≤10% of the episode |
| Motion blur | Blurred frames measured with sharpness metrics or optical flow | ≤5% of the episode |
| Camera tilt/framing | Workspace stays within the field of view without persistent misalignment | No sustained misalignment |
| Occlusion rate | Key elements blocked by the body or other obstacles | ≤10% of the target segment |
| Audio usability | Signal quality, clipping, and task-relevant audio | Usable audio for the task |
| Task completeness | All required steps captured | Full episode per task brief |
Accept a clip only if no critical dimension scores 0 and the total score is at least 80/100. You can conditionally accept one noncritical 0 if you document it. But any clip with a 0 in hand visibility, object visibility, or task completeness should be rejected.
Run automated checks on every clip before a human reviews anything. That first pass should cover:
- histogram analysis for exposure
- Laplacian variance for blur
- file integrity scans
- basic timestamp or sensor-sync checks
Human review should then focus on the parts software can't judge well on its own: task completeness, occlusion context, and framing calls.
It also helps to calibrate reviewers with real examples from the field. Build a short reject library with clips that show common failure modes, like a missing start state, a cabinet door blocking the workspace, or a recording that ends before the result is visible. That gives reviewers something concrete to compare against.
Only clips that pass QC should move into the labeling queue.
Design annotation schemas around model inputs and evaluations
Use the task categories and episode definitions from Section 1 to decide how deep the labels need to go. Start with what the model needs, then work backward. A coarse classifier needs far less detail than an imitation learning system.
For most Physical AI and robotics use cases, a layered schema should cover episode-level metadata, action segments with start and end timestamps, object and state labels, failure events, and natural-language summaries at either the episode or step level.
The depth of annotation should match the job. Episode-level labels and task metadata are often enough for retrieval, search, or coarse classification. Dense frame-level labels - like bounding boxes, masks, and hand pose - make sense only when the model needs fine spatial or temporal reasoning, such as manipulation policy learning or multimodal video-language alignment. Before going all-in on dense labeling, run a small pilot on a subset and compare model performance against a lighter-label version. That test can tell you fast whether the extra labeling cost is worth it.
For QA, mix gold-standard clips into annotator queues at regular intervals. These clips should already be labeled by domain experts. Track inter-annotator agreement on action boundaries and object identities. If an annotator falls below your threshold, pause and recalibrate before they continue production work.
The annotation schema should also drive the manifest, split assignment, and dataset card. If those pieces drift apart, the dataset gets messy fast.
Package delivery files, documentation, and acceptance reports
Carry consent version, privacy flags, and processing history into each episode manifest. A training team should be able to load the dataset and understand what they're looking at without hunting through side documents.
Use the episode ID as the primary key. Each episode folder should include the raw video, synchronized sensor streams, annotation files tied to timestamps, a per-clip manifest with QC scores and pass/fail status, plus consent and redaction status flags.
At the dataset level, include a manifest that lists all episodes, their train/validation/test split assignment, and the split protocol used. For example, if you hold out by contributor ID to prevent leakage, say so plainly.
Pair the files with a dataset card that documents motivation, composition, collection process, known limitations, recommended uses, licensing terms, and maintenance contacts. Add a formal acceptance report that sums up total episodes delivered, QC pass rate by dimension, annotation coverage, consent and redaction audit results, and any open issues with remediation plans.
A simple tiered delivery model keeps things clean:
- Bronze: raw ingested files
- Silver: QC-filtered redacted data
- Gold: annotated split-ready data
Each handoff between tiers should be logged so provenance stays clear from capture through delivery.
Conclusion: Turn the program into repeatable infrastructure
The main idea is simple: egocentric data collection works when it runs as a repeatable system, not a series of one-off sessions. Every stage leans on the next one. If scope, capture, privacy, QC, or packaging slips, the dataset starts to fall apart.
That system view matters for a practical reason. Repeatable workflows cut setup time and reduce rework. When teams treat the program like infrastructure, they can launch a new campaign by changing parameters instead of rebuilding the whole workflow from scratch.
A few simple indicators can show whether the program is maturing: first-pass QC pass rate (targeting ≥85%), episodes per day vs. plan, privacy incident rate per 1,000 episodes, annotation throughput per annotator-hour, and on-time delivery. If those numbers stay steady, the program is doing its job.
The biggest risk in egocentric data collection usually isn’t bad hardware or tough environments. It’s undefined standards that let weak footage, incomplete consent records, or inconsistent labels pile up quietly until they show up later as model failures. Treat egocentric data collection as infrastructure, and each new campaign gets faster, safer, and easier to trust.
FAQs
How long does it take to launch a program?
Launching a data collection program doesn’t have to drag on for months. If you map out the capabilities you want and set clear performance standards from the start, you can sidestep a lot of the usual delays.
And there’s good news on speed: with established expert networks and data services, teams can get representative demonstration data samples within the same week.
What should we do before scaling beyond a pilot?
Before you scale past a pilot, make sure the operating setup is ready for repeatable production. A pilot can prove that something works once. Production is different. It needs systems that can hold up day after day without falling apart when volume goes up.
Start with the basics. Check that your data collection pipelines, teleoperation rigs, and human review queues can handle full deployment. If any one of those pieces breaks under load, the whole rollout can stall.
You also need clear success standards. Not vague goals. Testable criteria that tell you whether the system is ready, where it falls short, and what needs fixing. At the same time, set formal incident escalation paths so people know exactly what happens when something goes wrong, who gets involved, and how fast the issue moves.
One more thing matters a lot here: don’t let manual interventions and edge-case events disappear into chat threads or one-off notes. Capture them as structured training data. That way, every exception becomes something the system can learn from instead of the same fire drill showing up again later.
Who should own privacy, QC, and dataset delivery?
In an egocentric data program, privacy, QC, and dataset delivery usually sit with the operations or MLOps teams that run the data infrastructure.
They handle the pipelines for human review, automated quality checks, and domain-expert feedback. At the same time, they make sure the data stays governed, carries the right timestamps, and matches security permissions so model training and evaluation can be trusted.