How to Build Annotation Schemas for Robot Data

Leela Yanamaddi
September 8, 2026
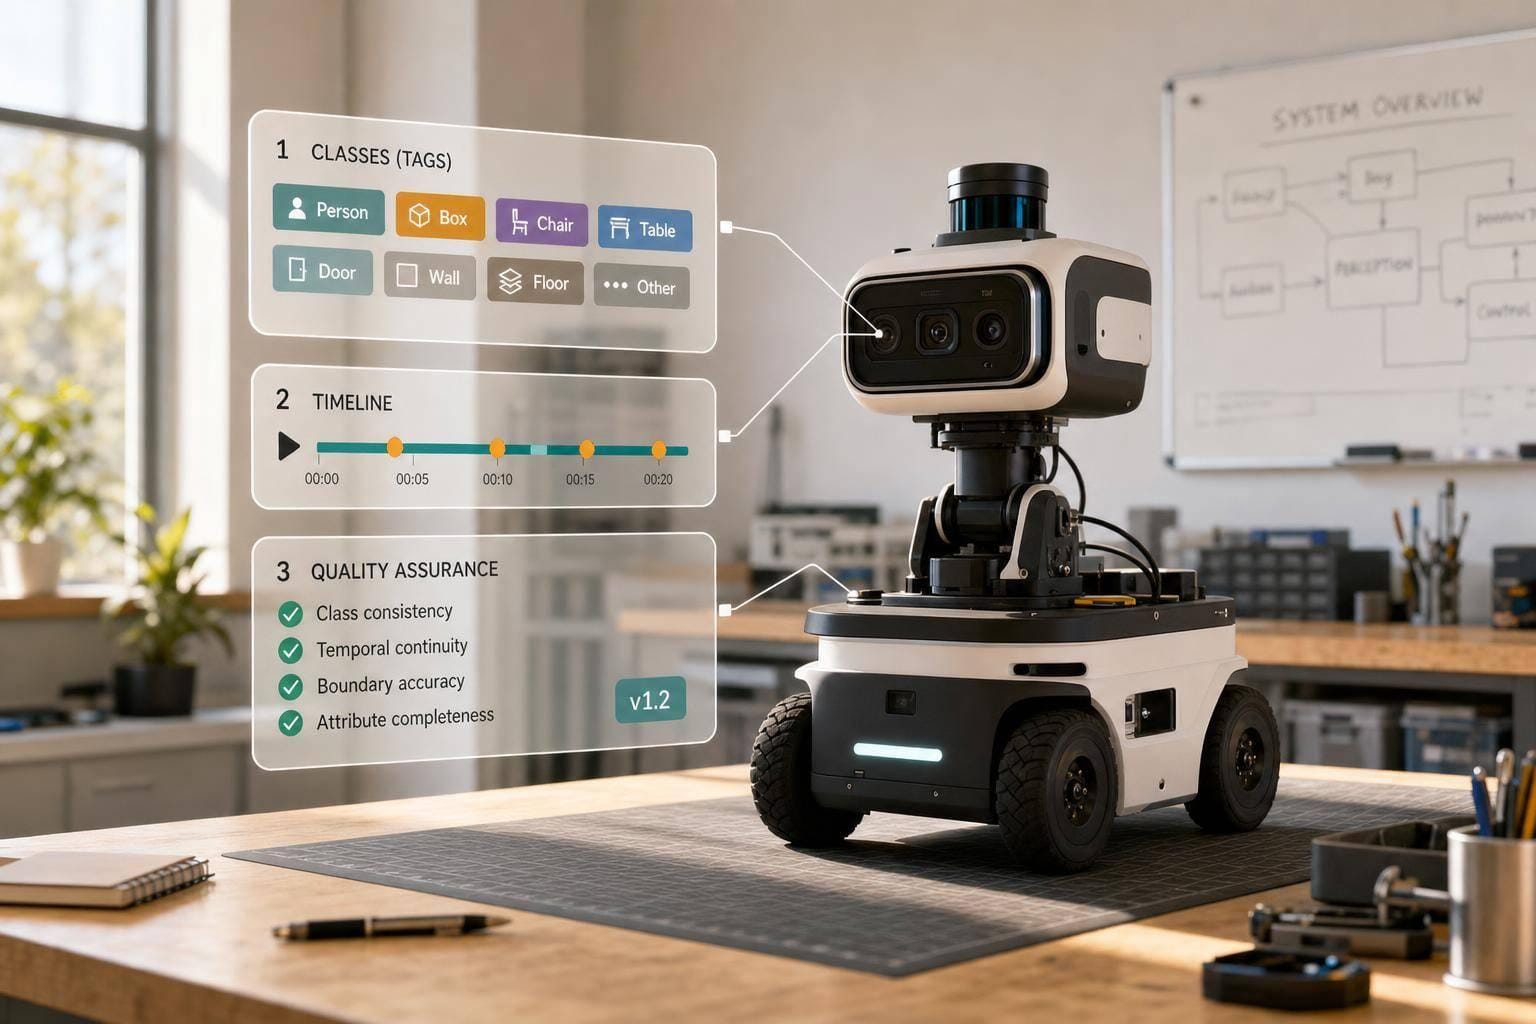
If your robot labels don’t match the task, the data won’t help much. I’d build the schema by working backward from the robot’s decisions: what it must detect, what action it took, when it happened, and whether the task worked.
Here’s the short version:
- I start with the Physical AI use case, not the label list
- I map each decision point to a label need
- I define classes, states, time rules, and output fields
- I test the schema on a pilot set before scaling
- I set QA checks for timestamps, labels, and edge cases
- I package the schema with guidelines, examples, and version notes
A good robot schema usually needs more than object labels. It often includes task phases, contact events, failure types, teleoperation handoffs, and episode outcomes. The article also points to concrete targets, like piloting on 0.5%–2% of expected volume, aiming for κ ≥ 0.80 in annotator agreement, reviewing 5%–10% of batches, and hitting at least 99.5% schema conformity before data moves forward.
What I like most here is the process: define the task, draft the schema, test edge cases, fix confusion, then lock QA and handoff rules. That keeps the labels tied to model training and day-to-day review instead of turning into a generic tagging exercise.
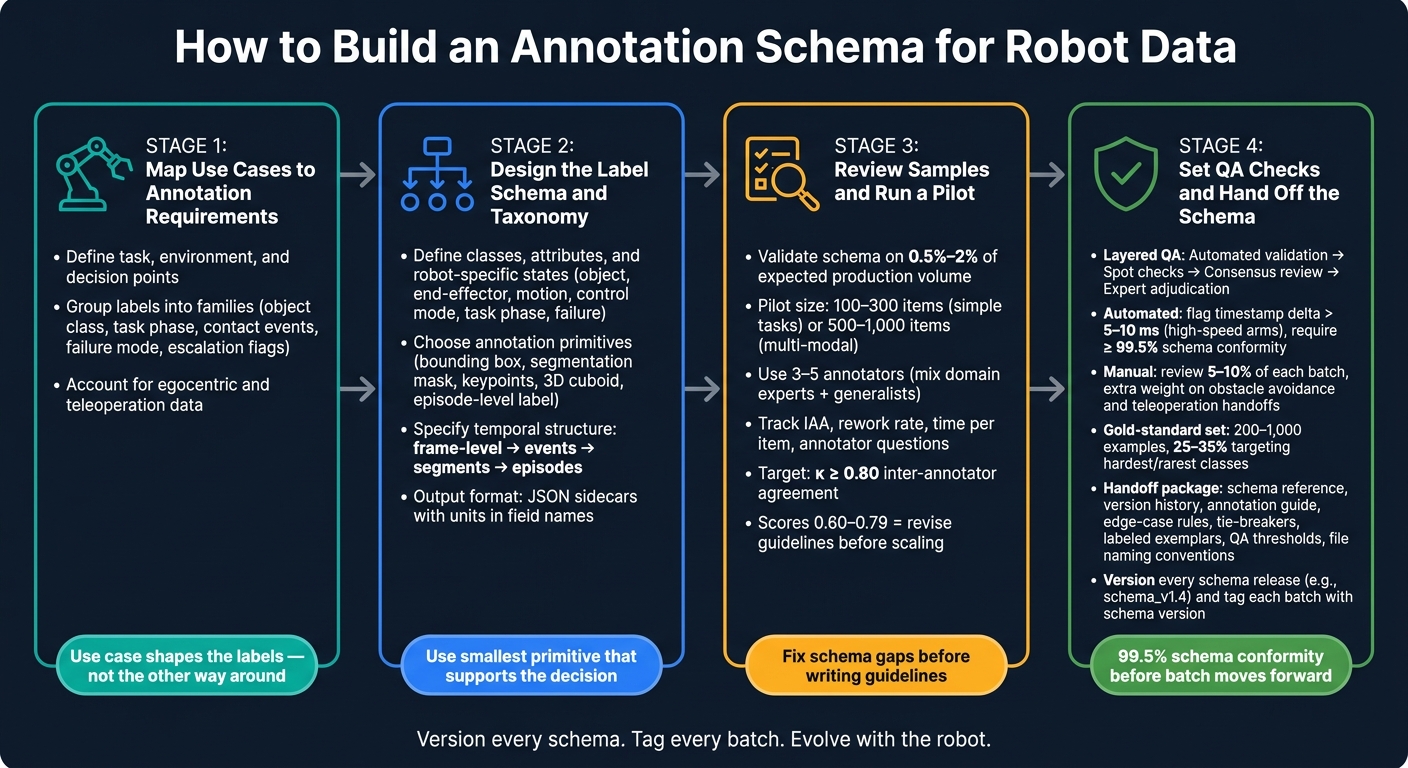
Robot Data Annotation Schema: 4-Step Build Process
1. Map Robot Use Cases to Annotation Requirements
Before you write a single label, get clear on what the robot is there to do and what calls its model needs to make. A robot that picks items in a fulfillment center needs a very different label set from one that inspects welds on a manufacturing line or moves between shelves. The use case should shape the labels, not the other way around.
Use the workflow from the introduction to turn each robot task into a clear label requirement.
Define the Task, Environment, and Decision Point
Start with plain language. What does the robot do? Where does it work? What can go wrong? Then walk through the workflow step by step and note the model input needed at each decision point.
For a warehouse pick-and-place robot, that usually leads to a clean list: detect the target SKU, classify pose, estimate grasp points, confirm grasp success, and decide between retrying or escalating. Each decision point turns into a label requirement.
For a conveyor inspection robot, the decisions are different. It may need to detect whether a defect is present, classify defect type such as crack, corrosion, or misalignment, assign severity, and trigger escalation when needed.
The environment matters just as much. A robot working in a busy distribution center with moving vehicles, pallets, and shifting lighting needs obstacle categories, plus lighting-condition and clutter flags. A more controlled setting may not need those at all.
List the Label Families Each Use Case Needs
Once the decision points are clear, group the labels into families. That makes the system easier to manage and version over time.
Group those requirements into label families before you define classes and attributes.
| Use Case | Core Decision Points | Label Families Needed |
|---|---|---|
| Pick-and-place | Grasp success, object pose, retry vs. escalate | Object class/state, task phase, contact events, success/failure flag, failure mode |
| Warehouse navigation | Obstacle avoidance, route selection, stop decisions | Obstacle category, traversable area, waypoints, trajectory result, near-miss events, escalation flag |
| Defect inspection | Defect present/absent, type, severity, escalation decision | Region of interest, defect type, severity score, detection timestamps, robot pose at detection |
| Teleoperated recovery | When to hand off, corrective action, outcome | Intervention start/end, trigger reason, operator action, post-intervention outcome |
Complex manipulation datasets often need both scene labels and outcome labels. Scene labels define the context. Outcome labels show whether the action worked.
Account for Egocentric and Teleoperation Data
If your dataset includes first-person demonstrations or remote operator interventions, the label requirements grow fast. Egocentric footage from head-mounted cameras or wearables needs hand pose, action segments, contact timing, and object affordances.
Teleoperation data is especially useful because it tends to contain edge cases. When a robot hands control to a human operator, that moment tells you a lot: what triggered the handoff, what the operator did, and whether the issue was fixed. Labels for this data should capture intervention start/end times, triggering condition such as perception failure, blocked path, or unexpected object, operator action, and post-intervention outcome. These sessions often become high-value training data for continuous model improvement.
Before you lock in any label families, make sure all data streams are time-aligned and spatially registered. RGB, depth, LiDAR, IMU, audio, and robot state logs often run at different sampling rates. If those streams are not synced to a common time base before annotation starts, labels can drift across modalities and become unreliable for training. Once the streams are aligned, move to sample review and a pilot batch.
2. Design the Label Schema and Taxonomy
Once you've mapped label families to use cases, the next step is turning them into a schema annotators can use the same way every time. The goal is simple: the schema should be non-overlapping and complete for the decision it needs to support.
Define Classes, Attributes, and Robot-Specific States
Each class needs a plain, fixed definition. In a warehouse aisle, for example, Obstacle might mean any object or surface that could cause a collision with the robot or its payload, while humans are labeled separately as Person. It also helps to include both inclusion and exclusion examples so annotators can handle edge cases with the same rule set.
Then define the attributes for each class based on what affects robot control. A target_object class, for instance, might include material_type, graspability, and fragility_level. For core attributes, stick with enumerated values. For uncertainty, use values like unknown, not_visible, or ambiguous. Free text should be saved for notes only. Each class and state should connect to a downstream control decision, such as grasp success, obstacle avoidance, or intervention.
If the task depends on relationships, spell those out too. Fields like contains, supports, part_of, or interaction_with make that structure explicit. And if your pipeline depends on control fields, add items like target_object_id, target location in the world frame, planned trajectory type, and safety mode.
Robot-specific state families should also be written out directly:
- Object state:
grasped,ungrasped,moving,stationary,damaged,intact - End-effector state:
open,closing,closed,in-contact,sliding,detached - Motion state:
idle,accelerating,constant velocity,decelerating,error-stop - Control mode / override state:
manual_mode,teleoperator_active,autonomous - Task phase:
approach,pre-grasp alignment,grasp,lift,transport,place,verify,recover-from-failure - Failure categories:
slip,collision,timeout,occlusion,mis-detection,mis-grasp,dropped-object,human-interruption
Some states need hard thresholds. For example, moving might mean centroid displacement of at least 0.05 m over 0.5 s, while slip could mean object displacement relative to the gripper of more than 1 in. before release.
Keep a state dictionary next to the schema. That dictionary should include short definitions, diagrams, and notes for messy cases like partial contact or a mid-grasp slip. This saves a lot of back-and-forth later.
Choose Annotation Primitives for Each Signal Type
Pick the annotation primitive based on the robot's decision. In practice, that means using the smallest primitive that still supports the decision.
| Primitive | What It Captures | Typical Robot Task | Advantages | Limitations |
|---|---|---|---|---|
| Bounding box | Coarse 2D location and extent | Mobile robot obstacle detection in warehouse aisles | Fast to label; good for detection tasks | Poor shape detail; weak for contact planning |
| Segmentation mask | Precise 2D object shape | Bin picking of irregular parts from cluttered bins | Enables fine grasping and collision margins | More expensive to annotate; sensitive to occlusion |
| Keypoints | Sparse landmarks on objects or tools | Tracking gripper fingertips during teleoperation | Good for pose, articulation, and hand tracking | Requires clear landmarks; misses full object extent |
| Polyline | Paths, edges, lanes, and boundaries | Mapping drivable paths for AMRs on factory floors | Good for navigation and tool paths | Not suitable for full object representation |
| 3D cuboid / pose | 3D position, orientation, and size | Forklift robot pallet localization with LiDAR | Directly usable for motion planning | Needs calibrated sensors; higher annotation complexity |
| Episode-level label | Whole-task outcome and metadata | Teleoperation session success/failure classification | Captures intent, success, and interventions | No fine-grained spatial info; must pair with low-level labels |
A lot of robot datasets mix primitives on the same data. A common setup is bounding boxes for perception and episode-level labels for task outcome.
Specify Temporal Structure and Output Format
Robot data unfolds over time, so the schema needs to represent that sequence at four levels:
- Frame-level labels attach to individual sensor samples with a
timestamp_msortimestamp_sfield tied to a shared reference clock. - Event timestamps mark point-in-time events such as a grasp command, collision, or operator intervention, stored with a type code and optional payload.
- Segments define time intervals for task phases, such as
approach_phasefrom 0.5 s to 3.2 s, with fields likephase_name,success_flag, andnum_interventions. - Episodes wrap full tasks or teleoperation sessions with summary metadata such as start and end times, overall outcome, total duration in seconds, and pseudonymized operator IDs.
For output, use JSON sidecars or a central JSON metadata file to store labels, metadata, coordinate frames, and alignment rules alongside the raw data. Name numeric fields with units in the field name, such as distance_to_obstacle_m, object_height_in, and task_duration_s.
In U.S.-localized workflows, it's common to keep 3D geometry in meters for model training while showing inches or feet in operator-facing dashboards. Use degrees for angles, seconds or milliseconds for time, and °F for environmental context.
Coordinate frames also need to be documented directly. Define a canonical world frame, often aligned with the factory floor, then spell out transformation rules for each sensor: RGB cameras, depth cameras, LiDAR, IMUs, and joint encoders. Add calibration_date and timestamp_precision_ms for each sensor in the schema.
Before you lock the rules, test these fields on a small sample set. That gives you a chance to catch schema gaps early, before they turn into annotation drift.
Next, validate these definitions on representative clips and turn them into annotation guidelines.
3. Review Samples and Run a Pilot Before Scaling
Validate the Schema on Representative Samples
Once your label set, primitives, and time format are set, test them on actual episodes. This sample should be representative, not random. In plain terms, it needs to show the full operating range: normal successful runs, failure cases like mis-grasps and collisions, occlusions, sensor noise, and rare events such as emergency stops or human interference. This is where you check whether label definitions, thresholds, and event boundaries hold up before writing guidelines.
A good starting point is 0.5%–2% of expected production volume, with extra weight on edge cases. For a single pick-and-place line, that usually means 50–100 episodes. In practice, schema problems tend to show up in those messy edge cases first.
For each sample, list every phenomenon that appears and map it to an existing label. If you have to invent labels on the spot, lean on "other", or write long free-text notes, treat that as a schema gap. Log the example ID, timestamp, phenomenon description, and proposed fix. Then use that issue log in the next schema revision before you write annotation guidelines.
Draft Annotation Guidelines from Real Edge Cases
Next, turn the schema into written instructions for annotators. Each label should include a plain-English definition, clear inclusion rules, clear exclusion rules, and at least one positive and one negative example pulled from the validation sample.
This is where real edge cases do most of the work. Say validation showed confusion between "collision" and "near-miss." The guideline should settle it with a firm rule: label "collision" only if physical contact occurs; close passes without contact are "near-miss." Put hard thresholds in the units people already use: metric for engineering specs, imperial for operator-facing rules.
Run a Pilot Batch and Fix Unclear Labels
For simple tasks, 100–300 items is usually enough. For multi-modal or multi-site datasets, aim for 500–1,000 items. Use at least 3–5 annotators, and mix domain-savvy reviewers with generalists. That mix is useful because it shows whether the guidelines make sense beyond the expert crowd.
Track four things during the pilot:
- Inter-annotator agreement (IAA) for each label
- Rework rate
- Time per item
- Annotator questions
For IAA, use chance-corrected agreement metrics such as Krippendorff's alpha or Cohen's kappa. A practical production target is κ ≥ 0.80. Scores between 0.60 and 0.79 point to moderate agreement and usually mean the guidelines need another pass before scaling.
After the pilot, trace each confused label pair back to its cause. Most of the time, the problem comes from one of four places: ambiguous data, an unclear definition, a missing category, or a weak example in the guidelines. Then fix the exact issue that caused the confusion. That might mean splitting a label that's too broad, adding a skip condition, or tightening a time rule.
The table below lays out common pilot failure patterns and what to change:
| Pilot Result | Revision Action |
|---|---|
| High annotator disagreement on a label | Refine inclusion/exclusion criteria; add gold-standard visual examples |
| Frequent use of "unknown" or "other" | Add a missing label category or split an overbroad class |
| Long annotation time on specific items | Simplify the decision rule or add a decision tree for that label |
| Annotators confused between two states | Add a contrast example showing both; define a hard threshold if possible |
| QA failures on temporal boundaries | Clarify when an event starts and ends; add a skip condition for ambiguous clips |
To help annotators handle tricky situations the same way, add a decision table to the guidelines. Here's a solid starting point based on common robot data edge cases:
| Scenario                                         | Correct Label            | Skip Condition                         | Notes                                                        |
|--------------------------------------------------|--------------------------|----------------------------------------|--------------------------------------------------------------|
| Human walks within 12.5 in of robot, no contact  | Near-Miss (Safety)       | Skip if distance > 24 in               | Use U.S. inches; estimate from floor markers if needed.      |
| Robot gripper touches object but fails to lift   | Failed Grasp             | Skip if contact is clearly incidental  | Do not label as collision unless there is damage or strong impact. |
| Teleoperator takes control for 10 s              | Teleoperation Override   | Skip if autonomy only suggests a path  | Mark start/end times using local time (e.g., 3:05–3:15 PM). |
| Camera fully occluded by worker's arm            | Sensor Occlusion         | Skip if occlusion < 0.5 s and trivial   | Add note if safety alerts are triggered concurrently.        |
| Robot stops due to unknown error code            | Safety Stop (Unknown)    | Skip if log shows scheduled pause       | Use error logs to distinguish routine vs. emergency stops.   |
After each pilot-driven revision, version-stamp both the schema and the guidelines, and record which version applies to each annotated batch. Then use that revised version as the basis for QA checks and annotation handoff.
4. Set QA Checks and Hand Off the Schema to Annotation Teams
Build Layered QA for Robot Datasets
Use a layered QA flow: automated validation first, then manual spot checks, then consensus review, with expert adjudication saved for safety-critical cases. Start with the pilot results to set your first QA thresholds.
Automated checks should catch issues before a human even looks at the batch. That includes missing fields, invalid class IDs, non-monotonic timestamps, sensor dropout, and cross-stream misalignment. Check timestamps, sensor alignment, and state persistence across RGB, depth, and robot logs. For high-speed robot arms, flag any camera-to-IMU timestamp delta above 5–10 ms. Also set a schema conformity rate of at least 99.5% before a batch can move ahead.
After that, review 5–10% of each batch, with extra weight on high-risk scenarios like obstacle avoidance and teleoperation handoffs. The point isn't just to see whether a label exists. It's to confirm that the label still matches the task phase and the control decision it was meant to support. If reviewers hit an edge case and disagree, settle it through consensus review before sending it to expert adjudication.
| QA Method | Error Types Caught | Cost | Recommended Use |
|---|---|---|---|
| Automated validation | Missing fields, invalid values, impossible timestamps, sensor misalignment | Low | Every batch, before human review |
| Spot checks | Label drift, boundary inconsistencies, routine class errors | Low–Medium | Completed batches; stable high-volume workflows |
| Consensus review | Ambiguous classes, subtle temporal transitions, mismatches across video, logs, and state data | Medium–High | Pilot batches, hard samples, and edge cases |
| Expert adjudication | Safety-critical events, rare failure modes, unresolved disagreements | High | Final decisions on high-risk or disputed labels |
Keep expert adjudication for safety-critical labels such as emergency_stop, near-collision, and unsafe_proximity. If one of these is mislabeled, the downstream cost can be serious. In gold-standard sets, apply zero-tolerance thresholds to these classes. Any discrepancy should go straight to expert review instead of consensus.
Once this QA flow is stable, package the schema for the annotation team.
Package the Schema, Guidelines, and Gold-Standard Examples
The handoff package should include seven items: the schema reference, dated version history, annotation guide, edge-case rules, tie-breakers, labeled exemplars, QA thresholds and escalation rules, and file naming conventions. The goal is simple: annotators should be able to do the work without stopping to ask what a rule means.
Gold-standard sets should cover routine operation, near-miss events, task failures, and teleoperation interventions. Add short notes that explain why each label was chosen. For most enterprise schemas, a useful target is 200–1,000 examples, with 25–35% aimed at the hardest or rarest classes. It also helps to hide a subset of these gold examples inside live production batches. That gives you a clean way to track annotator quality over time without telling people which items are under audit.
Every schema release needs its own version ID, such as schema_v1.4. Every annotated batch should also be tagged with the schema version that was active when labeling happened. If you make a breaking change - for example, splitting a label or changing a temporal boundary - bump the major version. Then state clearly whether older annotations need to be reworked or kept as a separate versioned subset.
Conclusion: Launch with a Schema Built to Evolve
Map the use case, design the taxonomy, validate samples, run a pilot, and hand off with QA controls in place.
Robot annotation schemas don't stay fixed for long. Models get better. Robots take on new tasks. Sensors change. Teleoperation workflows shift. Your schema has to move with all of that.
Treat each schema version and its guidelines as a versioned artifact: timestamped, logged, and tied to the exact batches produced under that version. That gives teams a clean record of what was labeled, when it was labeled, and which rules were in effect at the time.
FAQs
How detailed should a robot annotation schema be?
A robot annotation schema needs enough detail to match your operational goals and spell out labels that are clear and testable. Start by mapping your use cases. Then tighten the label set through sample reviews and a pilot run.
Add strong QA checks and a clear handoff to annotation teams so the schema stays consistent and catches nuanced errors.
When should I update or version the schema?
Update or version the schema after sample reviews, pilot runs, or QA checks show fuzzy labels, weak category boundaries, or uneven annotation.
Hand it off only after the rubric, schema, and QA feedback loop are locked in, so labels stay consistent over time.
What mistakes usually hurt robot annotation quality?
Robot annotation quality tends to fall apart when the schema is fuzzy or hasn’t been tested. The usual trouble spots are pretty simple: vague success criteria, labels that leave out key context about the environment or behavior, and pilot runs that aren’t strong enough to catch problems early.
To prevent that, tie each task to clear definitions, test the schema through pilot runs, apply strict QA, and pass validated instructions to the annotation team.